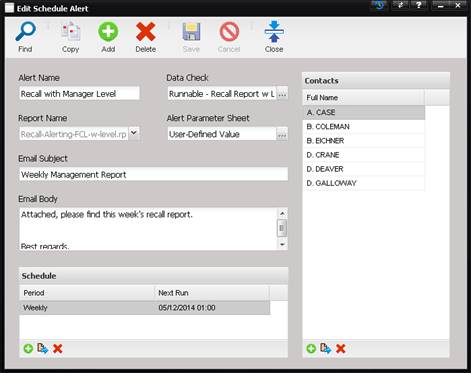
The Alerting Schedules option allows adding and editing scheduled alerts and emails. The New or Edit Scheduled Alert screen is displayed.
·
Alert Name –
The name of the Alert used to identify each Alert.
·
Data Check –
You may select a data check to run whenever this alert is triggered. Such
functionality enables database cleanup (since a Data Check may run SQL) as well
as conditional logic.
Note: Only Data Checks of
type “runnable” should be scheduled.
·
Report Name –
Displays a list of available reports.
·
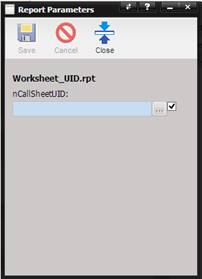
Alert Parameter Sheet – Displays the Report Parameters screen for entering
parameters related to the report. The parameters are specific to the report
being used. The labels for each parameter describe the data required.
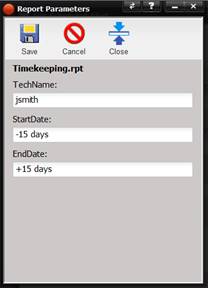
If the report parameter name is exactly equal to 'nFacilityUID' an option will be available for selecting a record using a lookup picker as displayed in the following Report Parameters screen.
In addition to the lookup picker, a checkbox is available on the right side of the control. Checking this checkbox, automates MET/TEAM to derive the relationship between the contact receiving the email and the value for the report.
Note: If there are more than values found, multiple reports are
generated and sent to the contact.
o
Enter the
required data and select the Save button. Date fields require a range as shown
below.
o
The offset is
relative to the day in which the report runs.
o
The options are:
“+” quantity [days, months, year] or “-“quantity [days, months, year].
·
Email Subject –
The content of the subject of the email that is sent to each contact.
·
Email Body –
The content of the body of the email that is sent to each contact.
·
Schedule Grid –
Displays each time this Alert is scheduled to run.
·
Period – The
occurrence of the Alert: Daily, Weekly, Monthly.
·
Next Run –
The time in PC local time that the alert will next run.
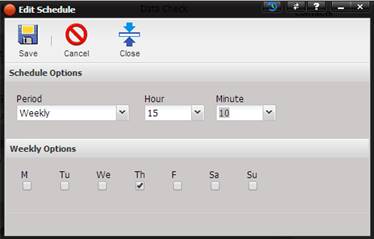
o Select the “+” Add button to add a new schedule. The New Schedule screen is displayed.
o
Period – The
occurrence of the Alert: Daily, Weekly, Monthly. If Weekly is selected, the day
of the week can be selected.
o
Hour – The
hour of the day the Alert will occur.
o
Minute – The
minute of the hour of the day the Alert will occur.
·
Contacts Grid -Displays
the contacts that will receive the Alert. You may only add a contact to the
grid once. Duplicates are not allowed.
The Save button at the top of the Alert screen must be selected before adding Schedules or Contacts to the Alert.