An understanding of Data Checks and SQL script is recommended when using this functionality.
Setting up a recall escalation report is possible using a default Data Check that is pre-configured to work with our standard “Recall-Alerting-FCL-w-Level.rpt” report.
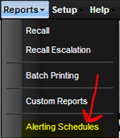
1.
To begin, create
a new Alert Schedule by navigating to Reports -> Alerting Schedules.
2.
The Find Alert
screen is displayed. Select the “+” Add button and the New Schedule Alert screen
is displayed.
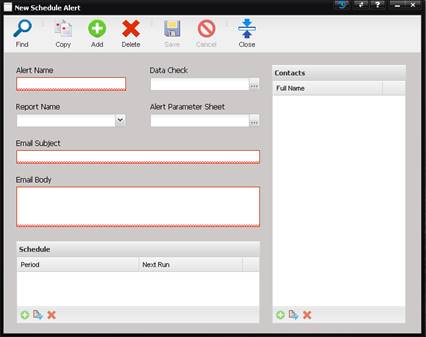
3.
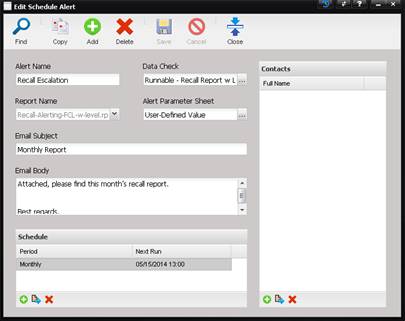
Enter a name for
this Alert in the Alert Name field. Any title will suffice.
4.
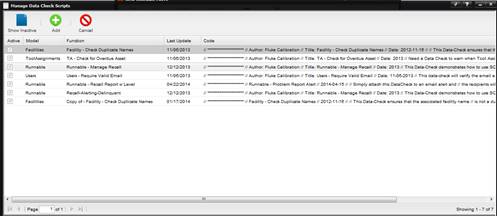
Next, select the
data check. A default Data Check has been provided with MET/TEAM titled
“Runnable – Recall Report w Level”. The purpose of this data check is to
automatically populate the recipient list prior to the report being executed. The
Data Check is pre-configured to detect which contacts should receive the report
and react accordingly.
5.
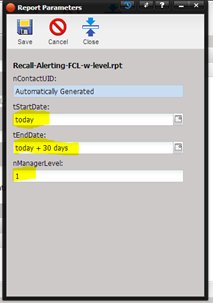
Now select the
actual report. By default, MET/TEAM ships with a report titled
“Recall-Alerting-FCL-w-level.rpt”.

6.
Select the “…” next
to the Alert Parameter Sheet field and the Report Parameters screen is
displayed for entering specific details regarding this instance of this report.
·
nContactUID
– This parameter is automatically populated by the Alerting Engine and requires
no further interaction.
·
tStartDate –
This parameter is used to specify the starting date for the recall escalation
process. Any asset with a “Next Maintenance Date” between the two parameters
tStartDate and tEndDate is eligible for recall escalation.
·
tEndDate –
This parameter is used to specify the ending date for the recall escalation
process.
·
nManagerLevel
– This parameter is used to specify how far up the hierarchy escalation should
go. The value must be 0 (contact level), 1 (contact manager’s level), 2
(contact manager’s level manager’s level), or 3 (contact manager’s level
manager’s level, manager’s level). Providing three levels of manager
escalation.
o
For example: suppose
there is a contact named Sam Smith who is associated with Facility by the name
of One Lab and whose manager is Bill Jones. Within One Lab, an asset is
currently overdue for maintenance. If the nManagerLevel parameter is set to 1, Bill
Jones will receive an email which lists the overdue asset.
7.
Fill in the
tStartDate, tEndDate, and nManager level fields. Select the Save button and
then the Close button to save the parameter settings and close this screen.
8.
Enter an Email
Subject and Email Body with the message to be included in the email.
9.
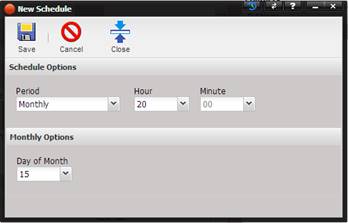
Set up a schedule
by selecting “+” button underneath the Schedule grid. The New Schedule screen
is displayed. Fill out the information
on this screen to specify the frequency that the report will be sent. Select
the Save button and then the Close button to save and close the Alert schedule.
10.
After completing
all the steps, the Schedule Alert screen should look similar to the screenshot
below.
11.
Save this
Schedule Alert and that’s it! You are now setup for recall escalation.