To enter data on the Manual Template, position your cursor in the UUT column on the far right and enter the calibration data for each test. If the data entered exceeds the specifications for that test defined by the template, the cell will turn red.
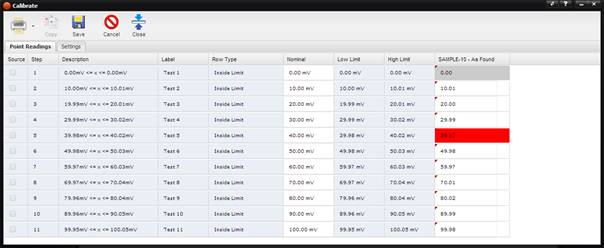
If the Allow Nominal Value Adjustment checkbox was checked for non-transducer templates, the values in the Nominal column are editable. Changing a value in the Nominal column causes the Low Limit and/or High Limit values to be recalculated.
For transducer templates, the values in the Ref Nominal column are always editable. Changing a value in the Ref Nominal column for Row Types Inside Limits (!), <= Limit (!) and >= Limit (!) causes the Low Limit and/or High Limit values to be recalculated. Values in the Nominal column are editable only for Row Types Inside Limits, <= Limit and >= Limit. Changing a value in the Nominal column for these Row Types causes the Low Limit and/or High Limit values to be recalculated.
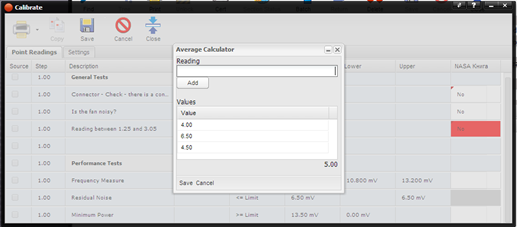
If you need to enter the average value of multiple UUT readings, right-click in the appropriate cell in the UUT column and select Manage Readings from the popup menu. The Average Calculator window is displayed. Enter readings one at a time in the Value box and click Add to add each reading to the Values grid. The calculated average of the readings entered appears below the Values grid. When all readings have been entered, click the Save button. The average value is written to the UUT Reading cell.
Note: When
entering data, avoid using the thousands separator as this may result in an
improperly formatted number.
The Print button provides the option to print a Crystal Report or to create a .CSV file. The Crystal Report prints one UUT Reading column. The .CSV file contains multiple UUT Readings as determined by the template.
The Copy button provides the ability to duplicate your data, but only if it the ‘Data Condition’ is marked ‘As Found’. This duplicated data will be copied exactly as-is, with the exception of the ‘Data Condition’ which will be changed to ‘As Left’ for the new record only. A yellow bordered window is displayed awaiting any changes that need to be made for ‘As Left’. Once saved, the resulting record can be seen on the Results tab of the Work Order.
Note: The Copy button is only enabled if the ‘Data
Condition’ is set to ‘As Found’, and the record has been saved at least once.
If a specific test cannot be performed, the technician has the option to set the entry to “Ignore”, using the right-click context menu.
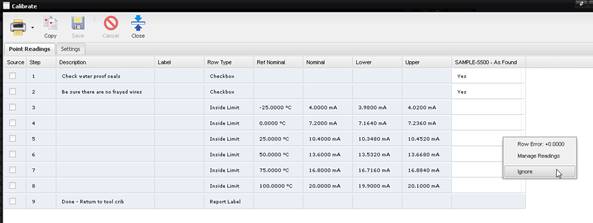
The field becomes disabled and displays in the same color/shading as the other fields that are not editable. To reverse the change, the same right-click menu offers a “Do Not Ignore” option.
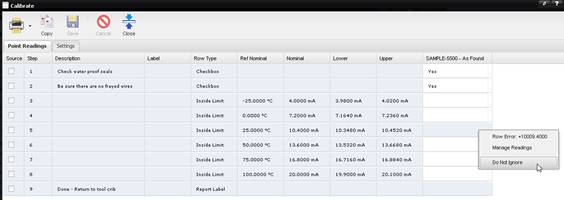
Test points set to be ignored are recorded with a Pass/Fail status of “N/A” on the point and do not affect the overall Pass/Fail determination of the work order result.