Two tabs are used
to enter shipping information and items.
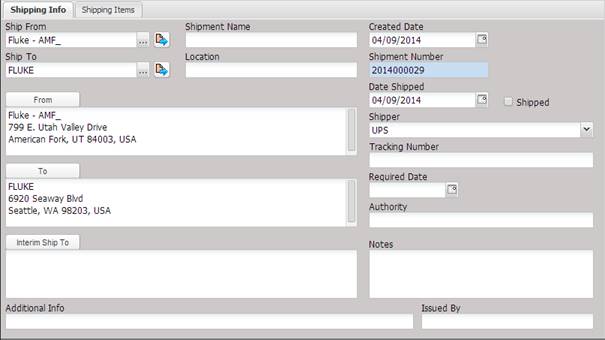
The Shipping Info
tab displays general shipping information.
·
Ship From –
The Facility that the shipment is shipping from. This location is preloaded with data from
the “Default” mailing address on the Facility Address tab.
o The ship from location can be changed by selecting the “…” button.
·
Shipment Name –
The name of this particular shipment.
·
Ship To –
The Facility that the shipment is shipping to.
o The ship to location can be changed by selecting the “…” button.
·
Location –
The location of the shipment in the facility that the shipment is shipping
from.
·
From – The
company name and address of the Ship From Location
o This Address is preloaded with data from the “Default” mailing
address on the Facility Address tab.
o The Address can be
manually edited or changed by selecting the “From” button and selecting a
mailing location.
·
To – The
company name and address of the Ship To Location who ultimate receive it
o This Address is preloaded with data from the “Shipping”
mailing address on the Facility Address tab.
o The Address can be
manually edited or changed by “To” button and selecting a mailing location.
·
Interim Ship To –
Address routed to between from and the to
o The address can be
manually edited or changed by “Interim Ship To” button and selecting a mailing
location.
·
Created Date –
Defaults to today’s date (the day the shipment information was creating).
·
Shipment Number –
Number of particular shipment
·
Date Shipped –
The date the shipment left the Ship From Location.
·
Shipped –
Automatically checked once the shipment is shipped. This checkbox cannot be
customized because the functionality is associated with the Date Shipped field
on this screen.
·
Shipper –
The mode of transportation used to transport the shipment to the Ship To
Location. Defaults to the top item in the dropdown list.
·
Tracking Number –
Tracking number for this particular shipment
·
Required Date –
The requested date.
·
Authority –
The source of the data. For example: manufacturer, NAVAIR, etc.
·
Notes –
Notes to the shipper concerning this shipment.
·
Issued By –
The person completing the shipment information.
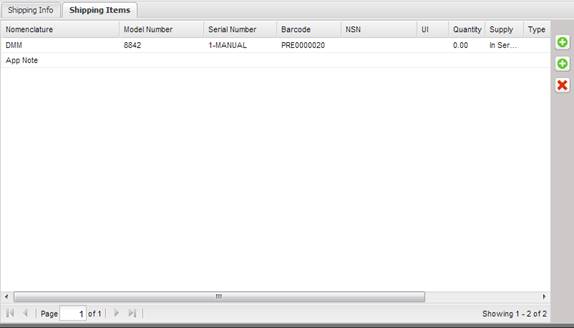
The Shipping Items tab displays the list of Assets being shipped in this shipment. Assets and non-Assets can be added or removed from the shipment.
·
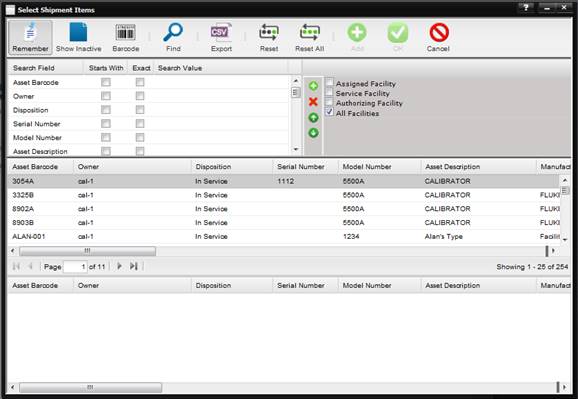
Select the top
“+” button on the right side to Add Asset
– The Find Select Shipment Items screen is displayed. Highlight each item
to be added to the Shipment and double click. The item will be moved to the
bottom part of the screen. Select OK when done.
·
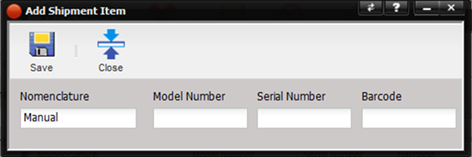
Select the 2nd
“+” button on the right side to Add
Non-Asset – The Add Shipment Item screen for adding an item that is not
part of the MET/TEAM data. Fill in the information and the item will be added
to the shipment item list.
·
Delete –
Prompts the use for confirmation to delete the highlighted shipment item and
then deletes the shipment item from the list.
The shipment information can be previewed and printed by selecting the Print button.