Labor time entries are viewable on the left grid. The toolbar is used to add or delete non-maintenance labor time for the technician.
To add Labor, select the Add button on the toolbar and complete the information on the Labor screen.
To modify a time record, highlight the desired record in the grid and double click.
·
Start
Date and End Date – To view time
records, the technician enters a starting and ending date. Once the dates have
been selected, the appropriate time records are retrieved and ALL time records,
maintenance and non-maintenance are displayed.
·
Technician
– MET/TEAM defaults to the currently logged in technician.
o To
view another technician’s work, select the “…” button.
Note: In the event the manager does not want this functionality to
be available this option can be secured.
· My Time Grid (left grid) – This grid shows all the time records for the selected technician based upon the dates selected.
o If the time is from a Work Order, the “WO Time” box is checked. In order for time to be altered on a “WO Time” record, the technician must go to that Work Order.
o To modify any of the time records, the technician double clicks the time record and the appropriate time record or Work Order is displayed.
o If the Work Order has been closed, the technician cannot change the time record.
o Grid records can be sorted by ascending or descending order by clicking on the header of the column.
·
My Work Orders Grid (right grid – Displays all of the Work Orders that have been
assigned to the selected technician. To go to the Work Order, the technician double
clicks the desired Work Order in the grid.
Grid records can be sorted by ascending or descending order by clicking
on the header of the column.
Two types of reports can be printed from the My Work screen. A Labor report can be printed and a Work Order report can be printed.
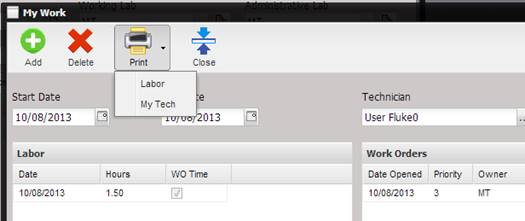
To print information from the Labor grid, select Labor after selecting the arrow by the Print button.
To print the information from the Work Orders grid, select My Tech after selecting the arrow by the Print button.