Tool Assignments is used to track the process of loaning Assets to contacts and provides a complete history for both Assets and Contacts.
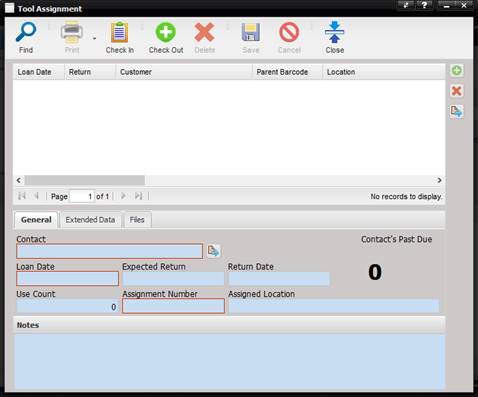
Find – Used to find existing assignment records.
Print – Used to print a report.
Check In – Used to return Tool Assignments.
Check Out – Used to create new Tool Assignments.
·
When checking out
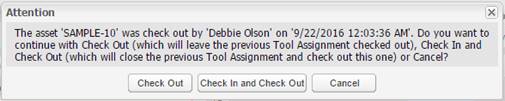
an asset a prompt is displayed if the asset is already checked out.
o
Select the Check
Out button on this prompt, if you want to leave this asset assigned to the
previous Tool Assignment.
o
Select the Check
In and Check Out button on this prompt, if you want to close this asset
assigned to the previous Tool Assignment and check the asset out on this Tool
Assignment.
o
Select the Cancel
button on this prompt, if you want to cancel the creation of this Tool
Assignment.
Delete – Used to delete a selected assignment.
Save – Used to save recent changes.
Cancel – Used to cancel recent changes.
Close – Used to close assignment screen.
When assigning Assets, the grid displays a list of Assets that are assigned when save is selected.
To add an Asset select the “+” button, select the Assets from the find dialog, then click OK.
To remove an Asset, highlight the Asset and select the “X” delete button.
To view or edit information for an Asset, highlight the Asset and select the Quick Link button.
When viewing current assignments the grid contains existing assignment records.
To add an assignment select the “+” button, select the currently assigned Assets from the find dialog, then click OK.
To remove an assignment, highlight the Asset and select the “X” delete button.
To view or edit information for an assigned Asset, highlight the Asset and select the Quick Link button.